This is not the typical “how I got the shot“. It’s more involved, but it does represent an idea that anyone can play with. Let’s start with the concept of taking a picture, in the studio or anywhere for that matter, and then transporting our subject matter to some other place.It’s certainly not necessary to use a green screen to do this, but it does make the post processing easier. For starters, cutting people and hair out is a very time consuming task without the use of a chroma-key to aid you. If any of you are not sure how to remove a subject from a green-screen in Adobe Photoshop and would like to, leave a comment below and I will do a quick tutorial.
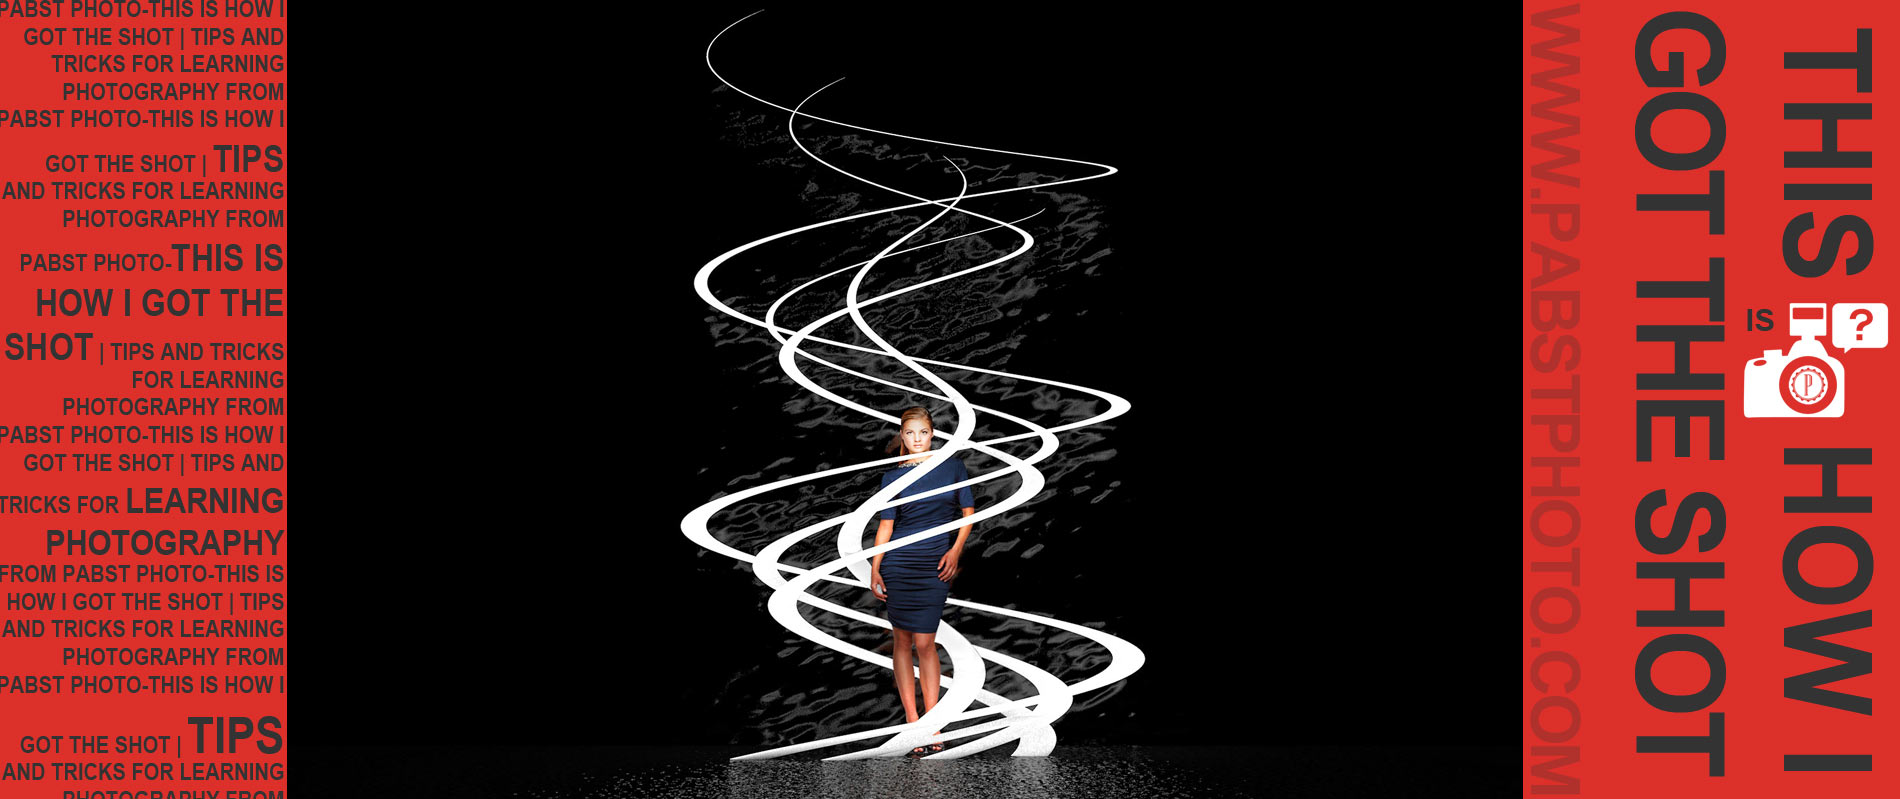
Image Concept: To take a portrait using a green screen backdrop and then transport that picture into a fictional place or an alternate background. For my process I used the same 3D software I’ve been using for the How I Got The Shot Series, and did all the work in there. But, you absolutely do not need 3D software to achieve some amazing results using a similar technique.
Image A | Chroma Key Cut Out
First thing you want to do, like image A, is cut out your content. I used a photography of a woman standing, but you could transport any thing, it doesn’t have to be a person. Image A exhibits the need to get a clean cut out of the subject matter. If you used a green/blue screen, that’s great and you should be able to use the background eraser tool or masking to remove the background from your subject matter. I wanted to show you the red background to give you an idea that we could really put anything behind our subject matter. Maybe we don’t have a nice RED backdrop in our toolkit; but a 50 dollar collapsible green screen background is all we need to insert any background we want.

Image B | What’s the New Background
As I mentioned, I decided to design my new background form scratch. That doesn’t t mean you couldn’t download an image from the internet like a beautiful sky, or something in outer space and place your subject in front of one of those. Or just a solid color, like the red above. This, simplified, is called compositing. This post is for the advanced user; and getting your subject to look as though it belongs in the new image takes practice. Matching the coloring of the image and the lighting is key to make your composite convincing. Using Photoshop you want to make sure the brightness and hue are about equal between the background and the subject.

Image C | Photoshop Composite
There is actually very little Photoshop involved in my final image because it is rendered out. I made the glowing vines in 3D and had them literally wrap around the subject. I placed my *.png cutout onto a rectangle and used the alpha channel to cut out the woman in 3D, that way the glowing vines could actually illuminate the subject anew. This post is not about the final image. The idea is simply to use a green/blue chroma key to change the image into whatever you want it to be. Could just be a clean black or white background, but the green gives you endless possibility. Have fun practicing and enjoy other tips and ticks right here on this photography blog. If you found this post and this website to be helpful, please ‘like’ ‘plus 1’ and ‘tweet’ for us. Sharing is caring. Happy shooting from Pabst Photo.