Tutorial on green/blue screen Chroma Key Photoshop Compositing

Steps in text below.
Chroma Key
In this tutorial, we search the net for a previously shot green/blue screen chroma image. Make sure to search for a large image when using Google Image Search. Next, we have to remove our image from the background. You could cut it out manually, and might have to if the background is really complicated. We look at the background eraser tool in Photoshop, but ultimately decide to use the Select menu and choose Color Range box. We simply used the eye dropper tool choose our chroma color and then adjust the fuzziness slider in order to get the proper cut out. Fuzziness is like hardness or feathering. Just slide it as far right as you can without being able to see white show through the dark. It will make a selection, and then we use the mask button and invert the selection (cntrl-I). Now our content is isolated from the background. We are now free to put whatever we want behind our subject/content. In this case, a female in a black dress.
Break: Check out more Photoshop Tutorials from Pabst Photo.
A New Background

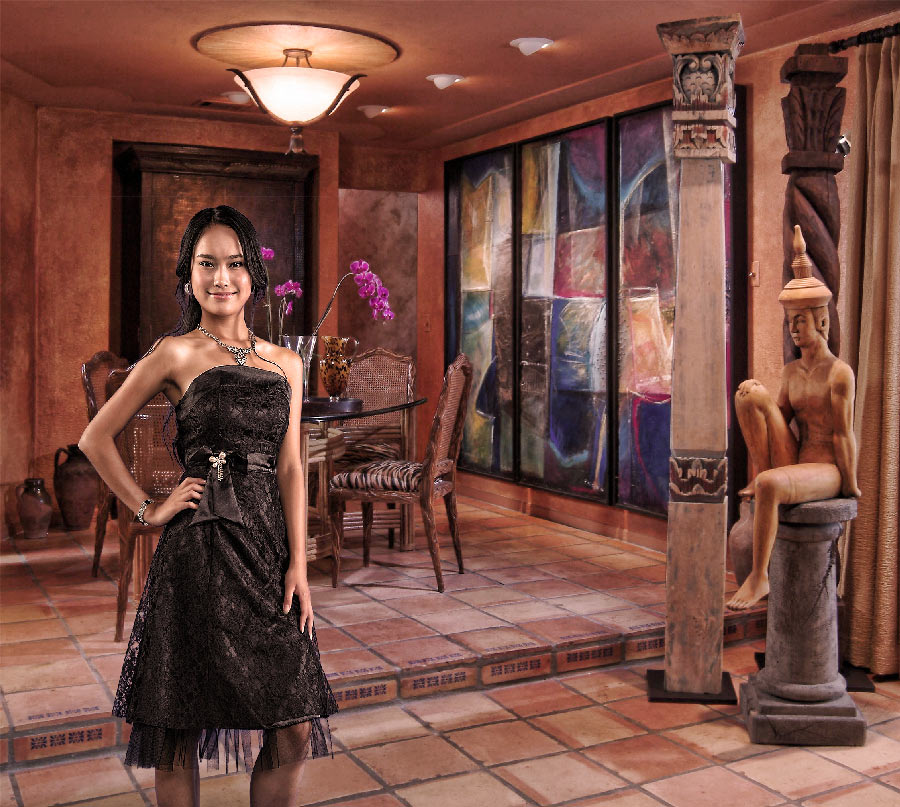 Now, we go back to Google image search to find a background to suit our tutorial. Again, make sure to find a large image to meet your needs. This will be our background image. The key to a good image composite is making it look right. Sounds obvious, but you need to have an eye to identify what’s wrong. Don’t try to get it to look perfect right away. Just try to identify what’s wrong. Maybe the color temperature or contrast; these are the first two things that are usually off. Next look at the brightness. You can either change the foreground object or the background object. It doesn’t matter; it’s up to you as the digital artist. In the case of this tut, the background was much warmer than our girl. So, we use a photo filter to warm her up. Additionally, identify where the light is coming from in your background. Then use the dodge/burn tool to correct your subject so that it appears to be lit from the same source of light.
A color tone over everything really ties the two layers together. This will have a greater impact than any of the other tweaks, and in a hurry, can suffice alone. Again, in this tutorial, we crop out a foreground chair that is throwing off the scale of the image. Lastly, we use a high pass filter to sharpen all the edges universally. Using the vivid light blending mode helps to bring the composite together.
BELOW is another composite if you want to see images. I didn’t save the one I was making in the video tutorial, then I realized it might be nice to see some stills. Enjoy. Leave a comment, get more tips and tricks by subscribing. Tweet, pin, like it, love it.
Hello, thank you for posting this tutorial. Just what I was looking for to help me out on this project I was working on at work.
Rob